Woodshop and Jobsite System Information
This Blog consists of Important information on Woodshop and Jobsite System Maintenance and Standards.
For optimal use of our product we recommend that you read before use:
Woodshop and Jobsite System Setup

Layout with single VACPAD connection. A basic setup consists of a VACPUMP or Vacuum pump , a foot release pedal, and a VACPAD.

Layout with Multiple VACPAD connections. A typical setup consists of a VACPUMP or Vacuum pump (preferably the 110v Vacuum pump Found Here), a foot release pedal, and multiple VACPADs linked together in series.
Ensure all hoses are capped off and all leads are connected snug with no cracks or leaks in the hoses.
Any leads that aren’t connected to a VACPAD must be capped (End Caps and VACPAD fittings can be Found Here)
Foot pedal diagram and installation
Standard Foot Pedal Connection Guide

Standard Foot pedal layout consist of 2 hose connections.
Hose connection coming from the VACPUMP / Vacuum pump will go into the fitting on the pedal marked A.
Hose connection coming from the VACPAD will go into the fitting on the pedal marked P.
The fitting on the pedal marked B is plugged and should remained sealed at all times.
The Standard Foot Pedal is typically sold with our Woodshop system
Small Pedal Connection Guide

Small Foot pedal layout consists of a single connection using a Y or T Fitting found in our VACPAD Fittings
Hose connection from pedal to Y or T Fitting will go into the fitting marked B in the figure above.
The fitting on the pedal marked A is plugged and should remained sealed at all times.
The Small Foot Pedal is typically sold with our Jobsite VACPAD System
Rotating and swivel mount Setup
The rotating mount is a simple addon to the woodshop and jobsite system that allows for articulation of the VACPAD in order to work on material at difficult angles.
Simply fix a VACPAD to the rotating mount with the 1/4-20 machine screws in the kit. Make sure these screws are fixed firmly as to create a seal for optimal suction pressure.

The knobs on either side of the rotating mount should be loosened in order to rotate the mount and tightened when the mount is in the desired orientation.
installing the Swivel mount
The rotating mount can be upgraded with a swivel mount that allows for 360° spinning articulation. The Kit requires the VACPAD to be removed from the rotating mount in order to slot in the swivel mount.

The swivel mount is then mounted with the spacing collar and large tightening nut sloted in on the underside.

The VACPAD mounts onto the swivel mount with the same mounting hardware from the rotating mount. Simply loosen the large hand nut and rotate freely, when the position of the pad is at the desired orientation, tighten the large hand nut to fix the pad.
Gasket Maintenance
Note:
The VACPAD 2.0 Design doesn’t need a cover plate and maintenance can be done by inspecting the gasket rope for any signs of wear and tear. All VACPAD products that have a gasket rope component can be installed using the method in this guide.
When installing rope gasket please follow the outline labeled below.
Press into the existing gasket channel on the underside of the VACPAD or Portable VACPAD.
Make sure to press along the beginning to the end ensuring the gasket is firmly seated in a clockwise motion with no gaps.

Where the rope has overlapped itself is where to make your cut, Make sure it is a clean square cut.

The cut doesn’t have to be exact, the gasket can stretch and shrink as you move it together to close the gap in the seam.
The seam where the gasket is cut is where the seal can be stretched to create a closed seamless seal.
When installing the Rope Gasket to the VACPAD 2.0 massage the gaskets into each other to ensure a tight fit.
Always check the condition and wear on the gaskets before use. Especially after long periods of storage. Examine the gasket for any excessive depressions or any tears. Check to make sure the gasket rebounds from depressions. The gasket should bounce back and be very flexible, if not a replacement is needed.
Securing Fix Mounted Vacpads to work surfaces
For all fix Mounted VACPADS it is recommended to use 1/4 - 20 threaded insert embedded to the mounting surface for optimal strength. pre-drill 5/16th hole, add a chamfer to allow insert to thread flush to surface. then use a 6mm hex key to screw in the insert to the surface.

Fix Mounted VACPAD secured to inserts with 1/4-20 Machine tapered head screws. Inserts and machine screws can be purchased at the VACSHOP in our VACPAD HARDWARE
Fix Mounted and Double suction Vacpad

Fix Mounted (F.M.) VACPAD
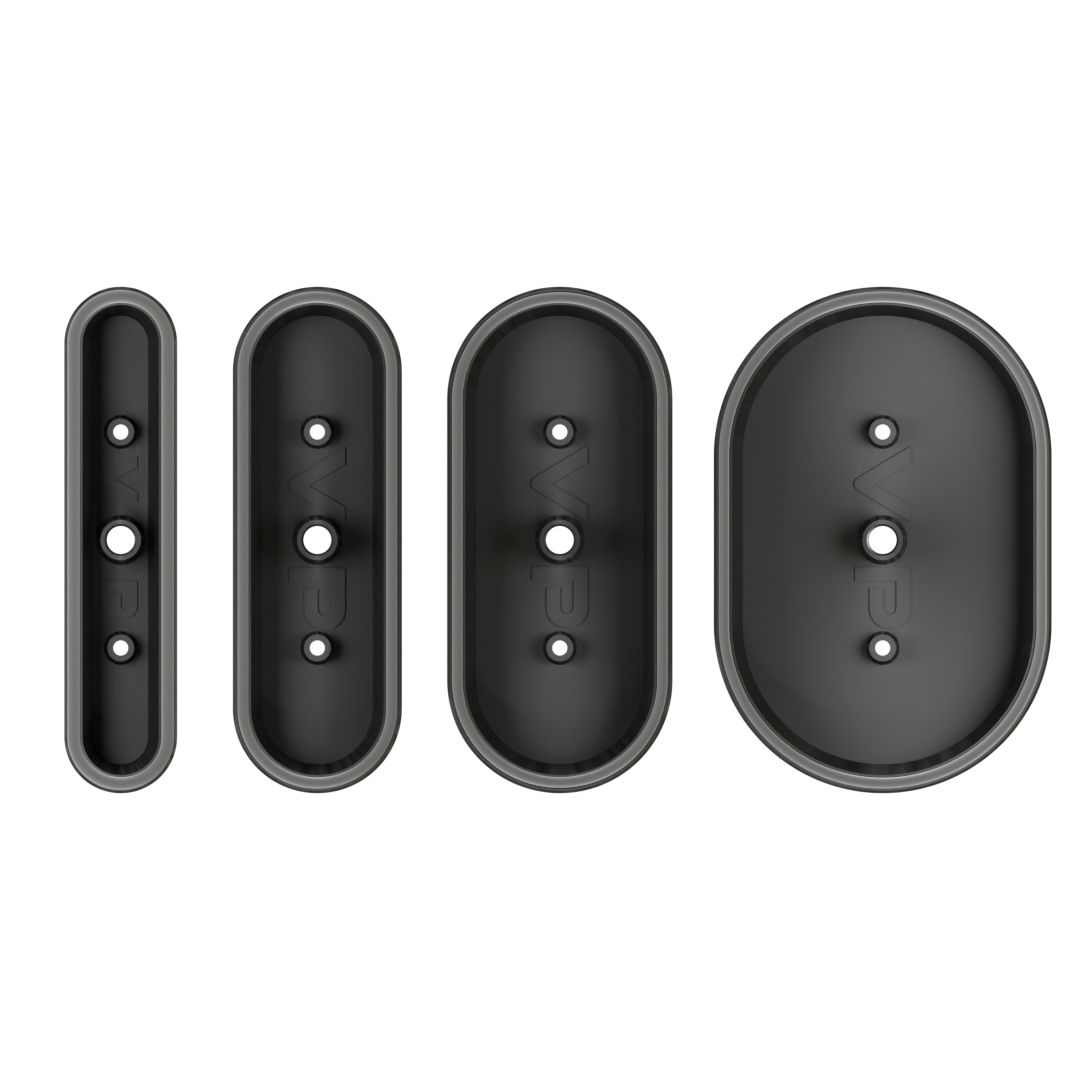
These VACPADs are predrilled with 2 holes in the pad surface. This is to allow the user to mount them anywhere on a surface for a more permanent and stable setup.
The images below show this style of VACPAD only has a gasket and valve on one side.
The side with the gasket and valve should be facing away from the surface that this is being mounted on.
When mounting make sure the screws used seat flat in the pre drilled counter sunk holes for best results.
Double Suction Pads have been discontinued. This information is for support on older models.
Double Suction (D.S.) VACPAD
This style of VACPAD is more versitile in that it can be lifted and moved due to its ability to be placed on any flat surface as long as the surface is flat and a seal is created on the backside.
The images below show the backside of this pad has a gasket and an opening for creating vacuum pressure.
The underside of the D.S. VACPAD should always be free of debris to ensure a stable working experience.
Notice the D.S. VACPAD has a valve on the top and no valve on the bottom, this is to help ensure the pad is engaged on the backside before the working material is applied to the top.