
Miter Clamp
This Blog mainly consists of information for operating and maintaining your miter clamps.
For optimal use of the miter clamp, we recommend reading this before use.
Miter Clamp Use Guide
The Miter Clamps has two faces, these correspond to the size of material you are using the clamps with.
The flat profile allows for a minimum moulding thickness of 1/2” and can handle up to 1-1/8”
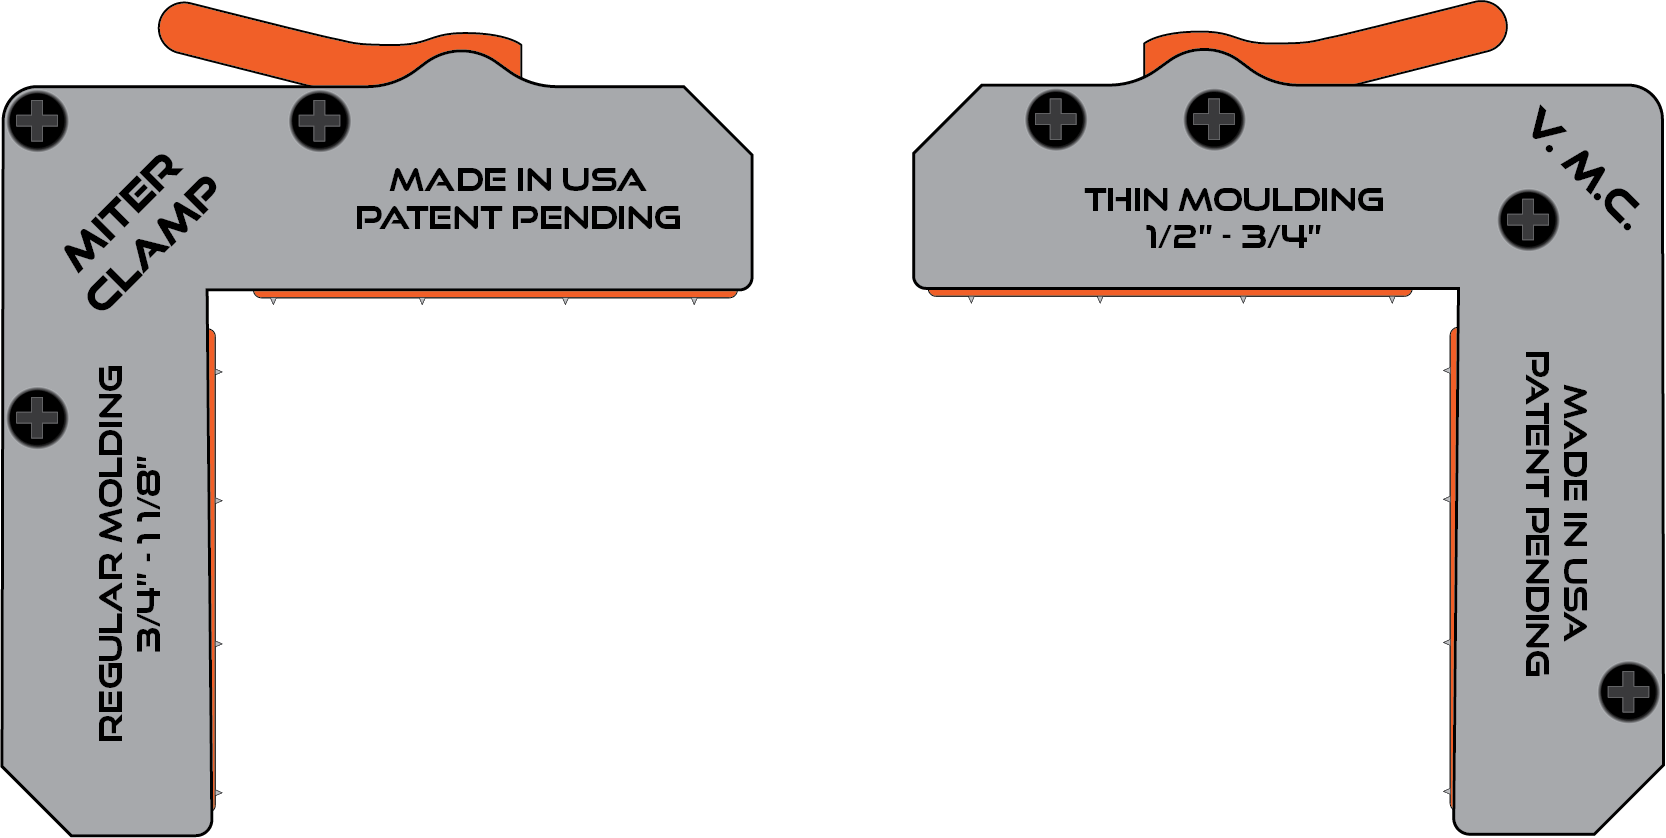
Please reference your Miter Clamp side to ensure you are using it with appropriate material thicknesses.

When securing a miter, make sure the clamp is pressed firmly against both surfaces.
Its important when applying pressure to take out any slack from the clamp body for optimal performance.

Engage the clamp by flipping the lever.
Be sure to check the clamp and material to ensure it has settled correctly before any adhesive cures.

When the miter has set.
Make sure to release the lever first.

Then the clamp can be removed from the material.

When removing the miter clamp, Inspect the pins to ensure they are sharp.
Damage to the pins on the clamping pads will reduce clamping pressure.

The gripping pins from the clamping pad are designed to keep pressure and hold the material.
Some circumstances might require some light sanding or filler to hide any imperfections.